Índice:
- Autor John Day day@howwhatproduce.com.
- Public 2024-01-30 11:37.
- Última modificação 2025-01-23 15:03.
Oi pessoal
Nesta educação, eu sou ganna introduzindo a biblioteca LCD5110_GRAPH e as funções sobre o gráfico de bitmap. Decidi isso porque se você ver o projeto Space Race Game na minha página, não mostrei como você pode fazer um gráfico de bitmap. Vamos começar…
Etapa 1: Recursos e conexão do display 5110LCD
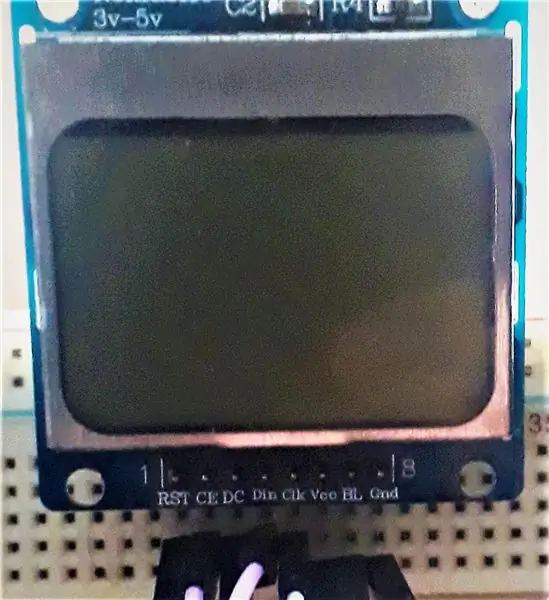
Recursos:
- 84 × 48 pixels
- Suplly 3.3V
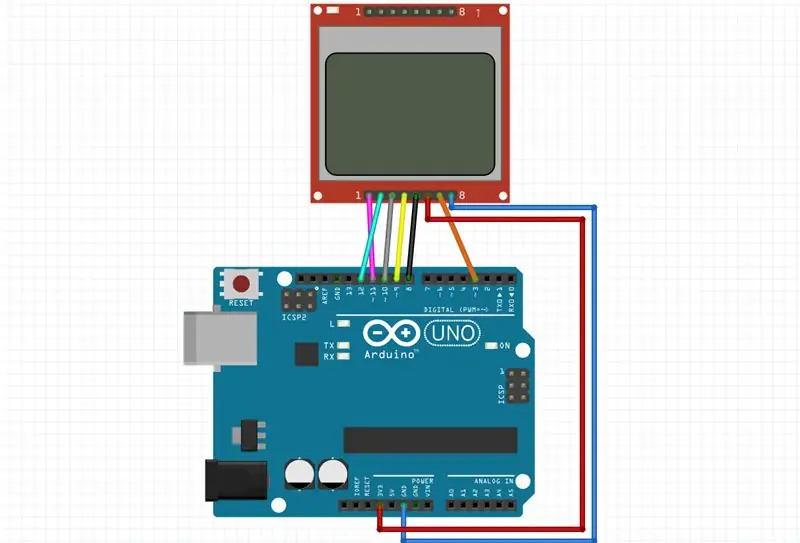
Conexão:
- VCC -> Arduino 3.3V (ou 5v)
- BL -> Arduino pino 3 (pino pwm)
- GND -> Arduino GND
- CLK (SCLK) -> Arduino pino 8
- DIN (MOSI) -> Arduino pino 9
- DC -> Arduino pino 10
- CE ou CS -> Arduino pino 12
- RST (RESET) -> Arduino pino 11
Etapa 2: ARQUIVO BMP
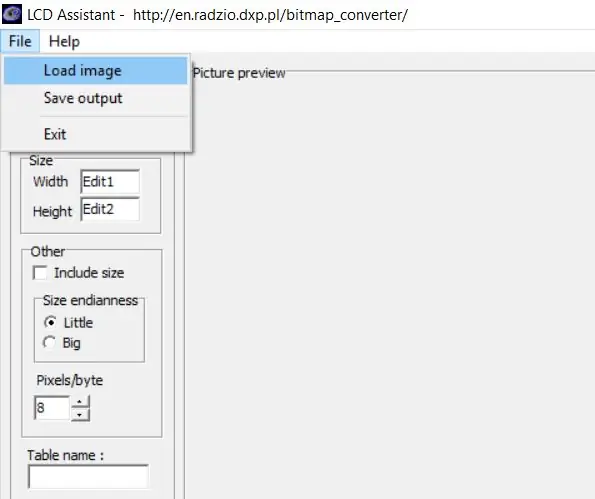
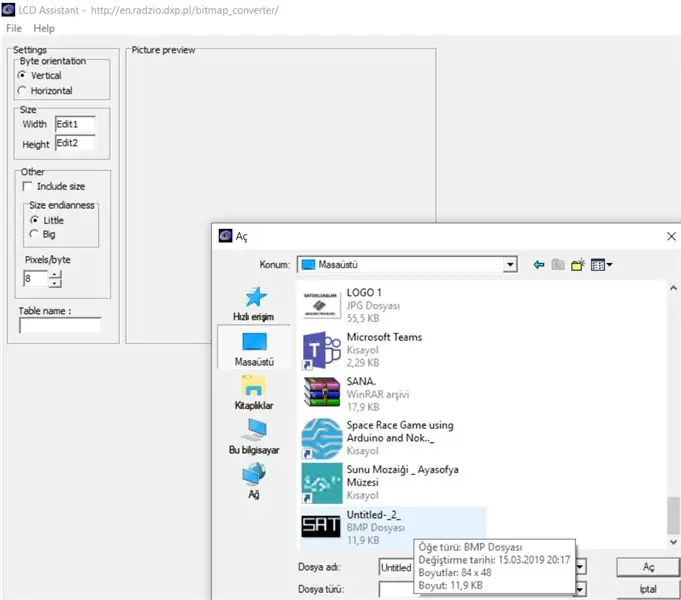
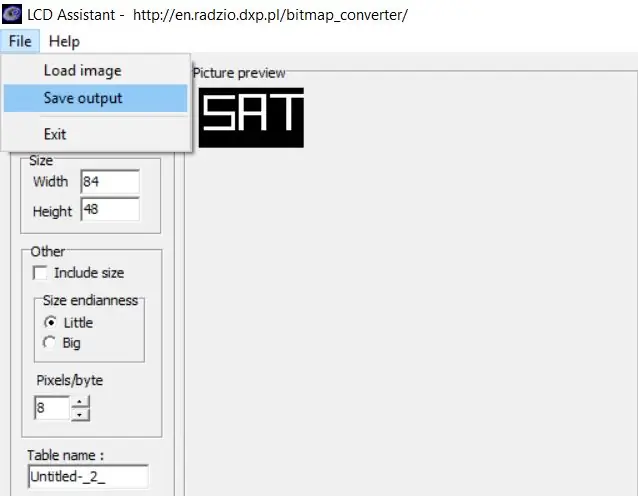
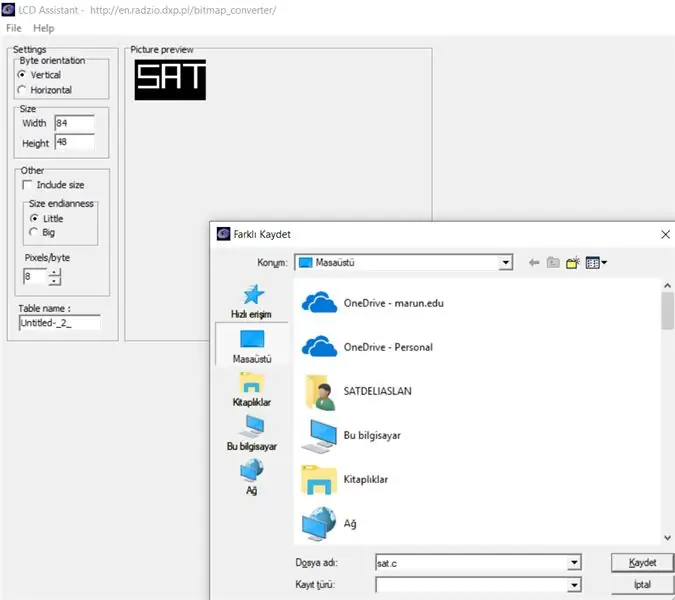
Vou mostrar passo a passo como criamos um arquivo bmp.
1-Crie alguns gráficos. Eu uso o Photo Editor para isso:
- Entre no editor de fotos
- Digite o botão "Criar novo"
- Selecione largura = 84 e altura = 48
- Desenhe o que quiser
- Salvar como.jpg
2-Converta o arquivo-j.webp
- Faça upload do seu arquivo.jpg
- Converter
- Salve
3-Crie um arquivo.c. Eu uso o LCD Assistant para isso:
- Dowland isso
- Digite o botão "arquivo" e, em seguida, "Carregar imagem"
- Digite "Salvar saída"
- Certifique-se de salvar o formato.c
4-Cole o arquivo.c na pasta de código que você usa.
Etapa 3: CODE

Eu uso 5110LCD_Graph e mostrarei algumas funções. Se você quiser aprender todas as funções, acesse o arquivo pdf.
#include // incluir biblioteca
extern uint8_t SAT ; // descreva o arquivo.c
int BL = 3; // descreve a luz de fundo
LCD5110 lcd (8, 9, 10, 11, 12); // nome do LCD5110 (clk, din, dc, rst, ce);
void setup () {
pinMode (BL, OUTPUT); lcd. InitLCD (); //name. InitLCD (); initilaze a tela lcd.setContrast (55); //name.setContrast (); definir contraste (entre 0 a 127)}
void loop () {
analogWrite (BL, 330); lcd.clrScr (); //name.clrScr (); limpar a tela lcd.drawBitmap (0, 0, SAT, 84, 48); //name.drawBitmap(x, y, nome (.c), largura (.c), altura (.c)); lcd.update (); //name.update (); atualize a tela}
// --------------------- CRIAR NOVA TAB ------------------------ ------------------------ // Arquivo gerado pelo LCD Assistant // https://en.radzio.dxp.pl/bitmap_converter/ // - -------------------------------------------------- --------------------------- #include // inclui esta biblioteca para usar PROGMEM // PROGMEM ajuda a usar pouca memória RAM const unsigned char SAT PROGMEM = {0xFF, 0xFF, 0xFF, 0xFF, 0x3F, 0x3F, 0x3F, 0x3F, 0x3F, 0x3F, 0x3F, 0x3F, 0x3F, 0x3F, 0x3F, 0x3F, 0x3F, 0x3F, 0x3F, 0x3F, 0x3F, 0x3F, 0x3F, 0x3F, 0x3F, 0x3F, 0x3F, 0x3F, 0x3F, 0x3F, 0x3F, 0x3F, 0x3F, 0xFF, 0xFB, 0xFF, 0x1F, 0x1F, 0x1F, 0x1F, 0x1F, 0x1F, 0x1F, 0x1F, 0x1F, 0x1F, 0x1F, 0x1F, 0x1F, 0x1F, 0x1F, 0x1F, 0x1F, 0x1F, 0x1F, 0x1F 0x1F, 0x1F, 0x1F, 0x1F, 0x1F, 0x1F, 0xFF, 0xF7, 0xFF, 0x1F, 0x1F, 0x1F, 0x17, 0x1E, 0x1E, 0x1F, 0x1F, 0x1F, 0x1F, 0x1F, 0x1F, 0x1F, 0x1F, 0x1F, 0x1F, 0x1F, 0x1F, 0x1F, 0x1F 0x1F, 0x1F, 0x1F, 0x1F, 0x1F, 0x1F, 0x1F, 0x1F, 0x1F, 0x1F, 0x1F, 0xFF, 0xFF, 0xFF, 0xFF, 0xFF, 0x00, 0x00, 0x00, 0xFE, 0xFE, 0xFE, 0xFE, 0xFE, 0xFE, 0xFE, 0xFE, 0xFE, 0xFE, 0xFE, 0xFE, 0xFE, 0xFE, 0xFE, 0xFE, 0xFE, 0xFE, 0xFE, 0xFE, 0xE6, 0xFE, 0xFF, 0xFF, 0xFD, 0x00, 0x00, 0x00, 0x00, 0xFF, 0xFF, 0xFF, 0xFF, 0xFF, 0xFF, 0xFF, 0xFF, 0xFF, 0xFF, 0xFF, 0xFF, 0xFF, 0xFF, 0x00, 0x00, 0x00, 0x00, 0xFF, 0xFF, 0xFF, 0xFF, 0xFF, 0xFF, 0xFF, 0xFF, 0xFF, 0xFF, 0xFF, 0xFF, 0xFF, 0xFF, 0xFF, 0xFF, 0x00, 0x00, 0x00, 0x00, 0xFF, 0xFF, 0xFF, 0xFF, 0xFF, 0xFF, 0xFF, 0xFF, 0xFF, 0xFF, 0xFF, 0xFE, 0xFE, 0xFF, 0xFF, 0xC0, 0xC0, 0xC0, 0xC7, 0xC7, 0xC7, 0xC7, 0xC7, 0xC7, 0xC7, 0xC7, 0xC7, 0xC7, 0xC7, 0xC7, 0xC7, 0xC7, 0xC7, 0xC7, 0xC7, 0xC7, 0xC7, 0x07, 0x07, 0x07, 0xFD, 0xFF, 0x7F, 0x00, 0x00, 0x00, 0x00, 0xC7, 0x47, 0x47, 0xC7, 0xC7, 0xC7, 0xC7, 0xC7, 0xC7, 0xC7, 0xC7, 0xC7, 0xC7, 0xC5, 0x00, 0x00, 0x00, 0x00, 0xFF, 0xFF, 0xFF, 0xFF, 0xFF, 0xFF, 0xFF, 0xFF, 0xFF, 0xFF, 0xFF, 0xFF, 0xFF, 0xFF, 0xFF, 0xFF, 0x00, 0x00, 0x00, 0x00, 0xFF, 0xFF, 0xFF, 0xFF, 0xFF, 0xFF, 0xFF, 0xFF, 0xFF, 0xFF, 0xFF, 0xFF, 0xFF, 0xFF, 0xFF, 0x7F, 0x7F, 0x6F, 0x7F, 0x7F, 0x7F, 0x7F, 0x7F, 0x7F, 0x7F, 0x7F, 0x7F, 0x7F, 0x7F, 0x7F, 0x 7F, 0x7F, 0x7F, 0x7F, 0x7F, 0x7E, 0x7F, 0x00, 0x00, 0x00, 0xFF, 0xFF, 0xFF, 0x00, 0x00, 0x00, 0x00, 0xFF, 0xFF, 0xFF, 0xFF, 0xFF, 0xFF, 0xFF, 0xFF, 0xFF, 0xFF, 0xFF, 0xFF, 0xFF, 0xFF, 0x00, 0x00, 0x00, 0x00, 0xFF, 0xFF, 0xFF, 0xFF, 0xFF, 0xFF, 0xFF, 0xFF, 0xFF, 0xFF, 0xFF, 0xFF, 0xFF, 0xFF, 0xFF, 0xFF, 0x00, 0x00, 0x00, 0x00, 0xFF, 0xFF, 0xFF, 0xFF, 0xFF, 0xFF, 0xFF, 0xFF, 0xFF, 0xFF, 0xFF, 0xFF, 0xFF, 0xFF, 0xFC, 0xFC, 0xFC, 0xFC, 0xFC, 0xFC, 0xFC, 0xFC, 0xFC, 0xFC, 0xFC, 0xFC, 0xFC, 0xFC, 0xFC, 0xFC, 0xFC, 0xFC, 0xFC, 0xFC, 0xFC, 0xFC, 0xFC, 0xFC, 0xFC, 0xFF, 0xDF, 0xFF, 0xFC, 0xFC, 0xFC, 0xFC, 0xFF, 0xFF, 0xFF, 0xFF, 0xFF, 0xFF, 0xFF, 0xFF, 0xFF, 0xFF, 0xFF, 0xFF, 0xFF, 0xFF, 0xFC, 0xFC, 0xFC, 0xFC, 0xFF, 0xFF, 0xFF, 0xFF, 0xFF, 0xFF, 0xFF, 0xFF, 0xFF, 0xFF, 0xFF, 0xFF, 0xFF, 0xFF, 0xFF, 0xFF, 0xFC, 0xFC, 0xFC, 0xFC, 0xFF, 0xFF, 0xFF, 0xFF, 0xFF, 0xFF, 0xFF, 0xFF, 0xFF, 0xFF, 0xFF, 0xFF, 0xFF, 0xFF, 0xFF, 0xFF, 0xFF, 0xFF, 0xFF, 0xFF, 0xFF, 0xFF, 0xFF, 0xFF, 0xFF, 0xFF, 0xFF, 0xFF, 0xFF, 0xFF, 0xFF, 0xFF, 0xFF, 0xFF, 0xFF, 0xFF, 0xFF, 0xFF, 0xFF, 0xFF, 0xFF, 0xFF, 0xFF, 0xFF, 0xFF, 0xFF, 0xFF, 0xFF, 0xFF, 0xFF, 0xFF, 0xFF, 0xFF, 0xFF, 0xFF, 0xFF, 0xFF, 0xFF, 0xFF, 0xFF, 0xFF, 0xFF, 0xFF, 0xFF, 0xFF, 0xFF, 0xFF, 0xFF, 0xFF, 0xFF, 0xFF, 0xFF, 0xFF, 0xFF, 0xFF, 0xFF, 0xFF, 0xFF, 0xFF, 0xFF, 0xFF, 0xFF, 0xFF, 0xFF, 0xFF, 0xFF, 0xFF, 0xFF, 0xFF, 0xFF, 0xFF, 0xFF, 0xFF, 0xFF,};
Etapa 4: OBRIGADO POR VISUALIZAR
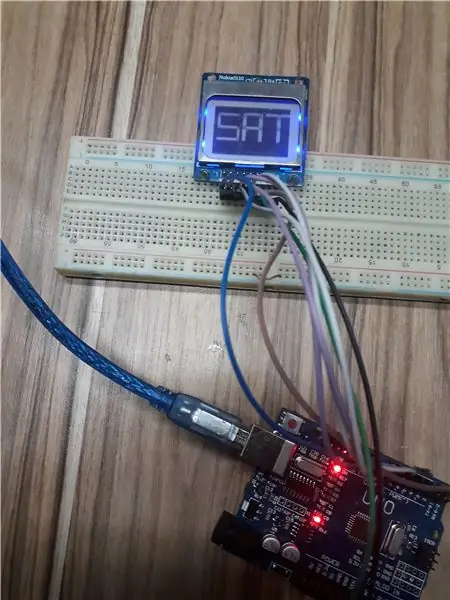
Muito obrigado pela leitura! Se você tiver alguma dúvida, entre em contato comigo ou escreva um comentário …
Recomendado:
Leitura e representação gráfica dos dados do sensor de luz e temperatura com Raspberry Pi: 5 etapas
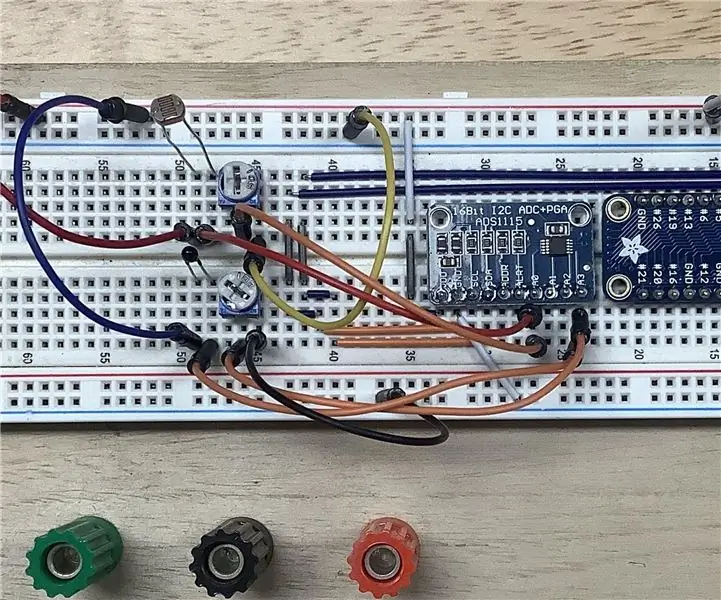
Leitura e representação gráfica de dados do sensor de luz e temperatura com Raspberry Pi: Neste Instructable, você aprenderá a ler um sensor de luz e temperatura com o conversor analógico-digital ADS1115 e o conversor analógico-digital ADS1115 usando matplotlib. Vamos começar com os materiais necessários
Aplicativo da Web para educação: 13 etapas

Education Web-app: Este projeto foi criado como uma tarefa para o curso de vídeo e televisão digital em que tínhamos que resolver o problema de ensino e aprendizagem em três níveis: Metodológico, Funcional e conceitual. Este projeto foi criado como uma tarefa
Educação passo a passo em robótica com um kit: 6 etapas
Educação passo a passo em robótica com um kit: depois de alguns meses construindo meu próprio robô (consulte todos eles), e depois de duas peças falharem, decidi dar um passo para trás e repensar meu estratégia e direção. A experiência de vários meses foi às vezes muito gratificante e
Temp Disply no display 3310 de forma gráfica: 5 etapas
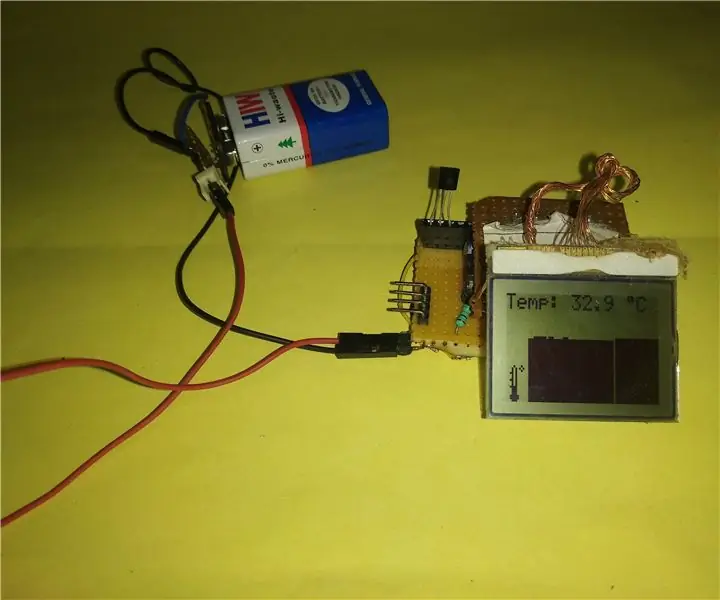
Temp Disply em 3310 Display Graphic Way: Olá, sou starkship; tenho um canal no youtube ASSIM ESTE PROJETO SOBRE O USO DE NOKIA 3310 DISPLAYSUPPLY: -1 X NOKIA 3310 DISPLAY (ANTIGO / NOVO QUALQUER UM) 1 X ARDUINO UNO / NANO (TODOS OS TIPOS ESTÃO TRABALHANDO) 1X LM35 TEMP SENSOR1 X 10uf (CAPACITOR ELETROLÍTICO) algum fio
Visor da placa gráfica: 4 etapas
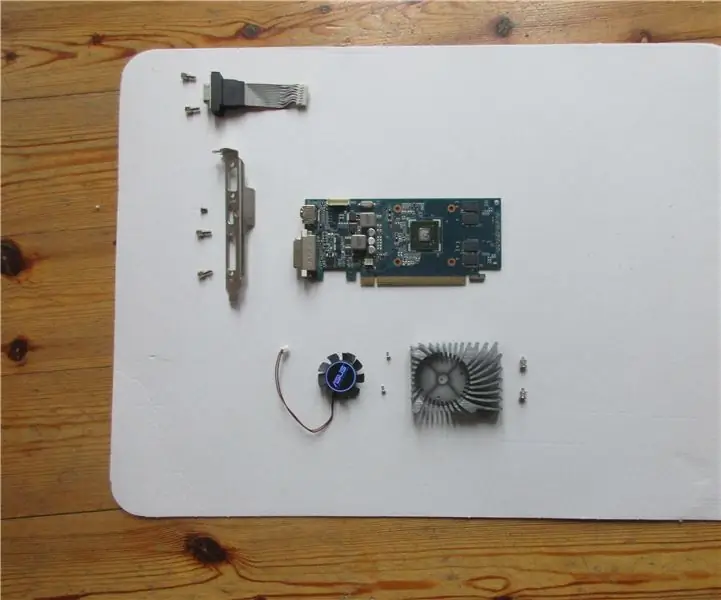
Display da placa de vídeo: neste tutorial, vou mostrar como transformar uma placa de vídeo antiga em um display de como funciona uma GPU
